What you’ll take away
- Moon phases change our view of the sunlit part; the Moon does not lose pieces or turn into a crescent-shaped object.
- The half facing Earth and the half facing the Sun are different choices of hemisphere.
- Waxing and waning describe the changing visible bright portion, while crescent and gibbous describe its shape.
- An ordinary phase is not Earth’s shadow crossing the Moon; that shadow belongs to a lunar eclipse.
- Use diagrams or an adult-supported paper model, keep notes private, and never search for the Moon near the Sun.
A crescent is a view, not a missing piece
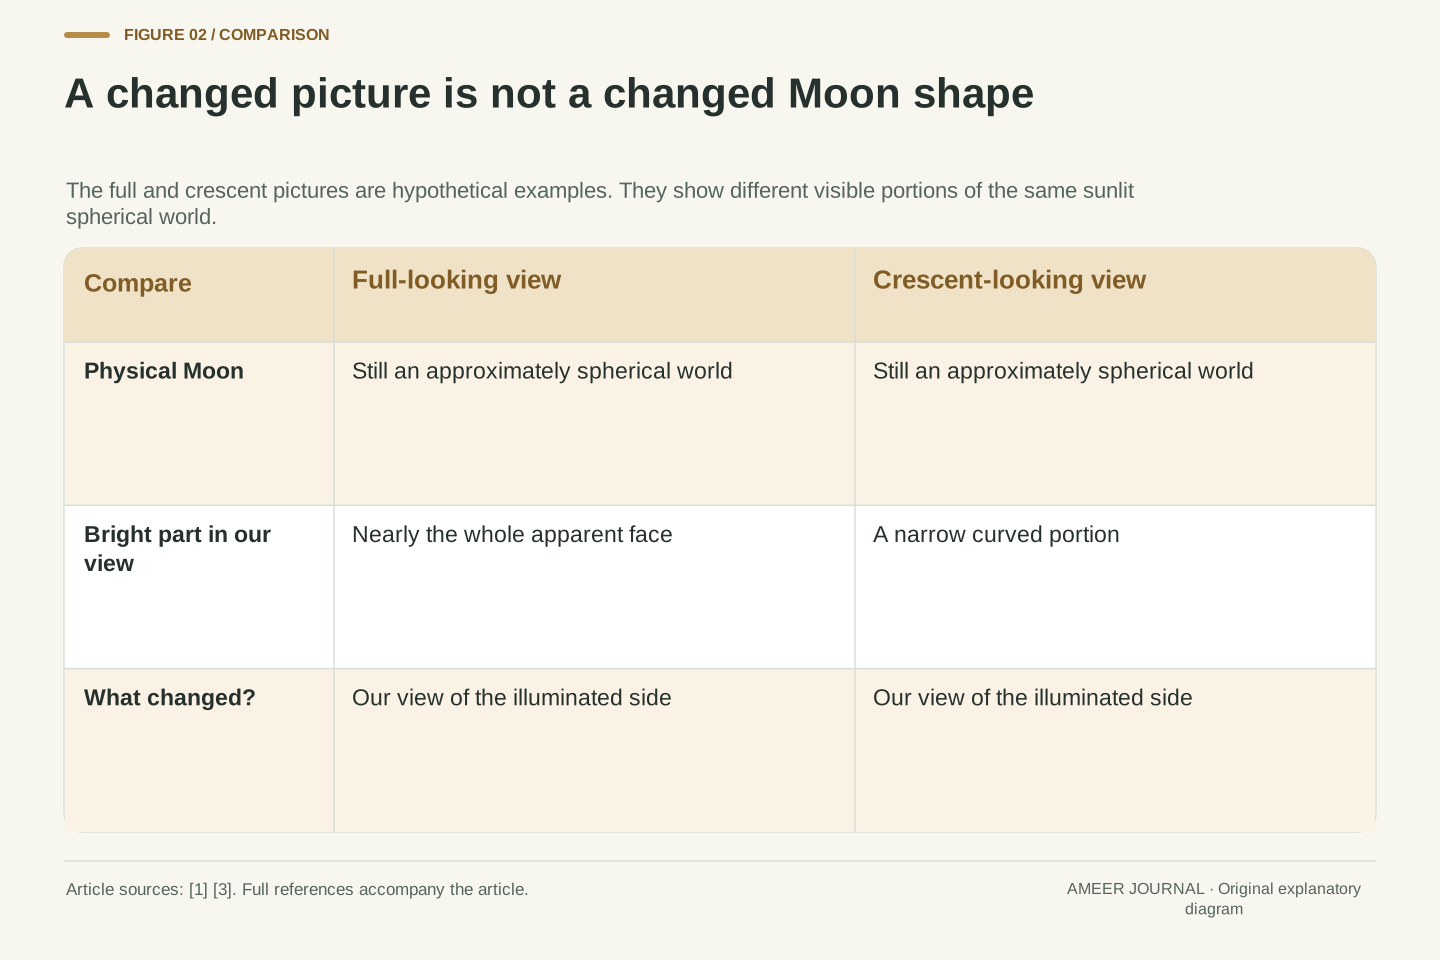
Imagine finding two pictures of the Moon. In one, it looks like a bright round plate. In the other, only a slim curved part looks bright. Did a piece break off between the pictures? No. NASA explains that the Moon's shape is not changing through the month; our view of its sunlit part changes [1]. The Moon remains an almost round world with a three-dimensional surface. A crescent describes the bright shape we see, not a Moon that has turned into a curved slice.
This is our question: how can one round object make different bright shapes? We will follow light, then think about which side of the Moon faces Earth. You can explore everything with the diagrams and a grown-up. No telescope, late night or search near the Sun is needed. Imagine you are arranging a picture book, with each page showing another view in the repeating pattern. Before learning all the names, ask what stayed the same and what changed. The object stayed there; the part of its sunlit side in our view changed.
A lunar phase is an illumination appearance, not a change in the Moon's physical shape. NASA describes the Moon as an imperfect sphere and attributes the changing appearance to our view of the sunlit surface as the Earth-Moon-Sun geometry changes [1][3]. The visible bright region is a projection of part of a three-dimensional surface. Treating a crescent as a physically crescent-shaped body would confuse an observed image with the object producing it.
The reader task is to explain two imaginary Moon photographs using one consistent model. The Easy version supports a child working with an adult; this version makes the illumination and viewpoint assumptions explicit. We use idealized spherical geometry for the main explanation, then acknowledge eclipses, earthshine and viewing orientation where they matter. No image in the worked discussion is presented as a photograph we took. The diagrams can provide the complete learning activity, without direct solar viewing, optical equipment, night travel or collection of a child's personal information.
Follow the light from the Sun to the Moon
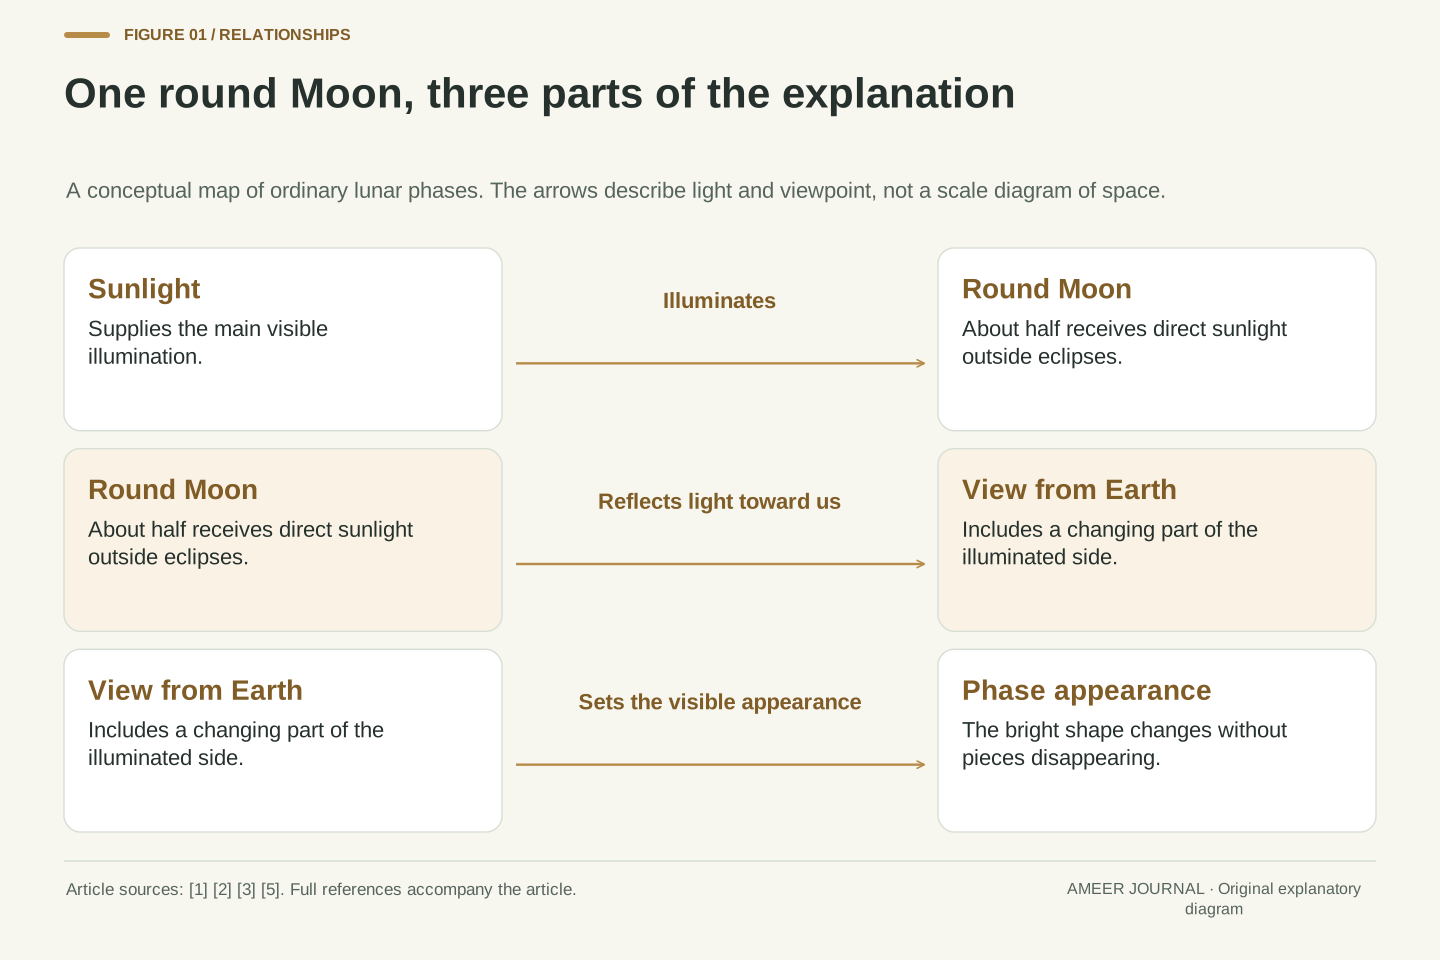
The bright moonlight in an ordinary Moon picture comes mainly from sunlight reflected by the lunar surface. The Moon is not a lamp making that visible light for itself. The Royal Observatory explains that the Sun is the main source lighting the Moon, and NASA describes the same reflected-light journey [1][5]. You can think of a bright wall in a room: the wall can be easy to see because light reaches it and then reaches your eyes. It does not have to be a light bulb.
In our simple model, sunlight arrives from one direction and directly lights about half of the Moon. The other half faces away. We will set eclipses aside for now, because they are a different event [3]. Also, facing away from direct sunlight does not always mean completely invisible. NASA describes earthshine: sunlight reflects from Earth onto the Moon and can make its otherwise dark-looking part glow faintly [2]. That faint glow has not filled a missing piece back in. The round Moon was there the whole time.
The useful source distinction is between emitted light and reflected illumination. For the visible phase pattern considered here, the Sun supplies the dominant illumination and the lunar surface reflects part of it toward the observer [1][5]. Avoid the broader and unnecessary claim that the Sun is the only possible source of light anywhere in the solar system. The mechanism needed for this article is specifically the source of the Moon's familiar visible brightness.
With a distant source and a spherical model, approximately one hemisphere receives direct sunlight outside eclipses. The directly unilluminated hemisphere is not necessarily perfectly black in an actual image. NASA explains earthshine as sunlight reflected from Earth onto the lunar surface [2], and the Royal Observatory notes that sunlight remains the principal source [5]. Separate direct solar illumination, indirect illumination and visibility. This prevents a photograph showing the faint outline of a crescent Moon's dark-looking portion from being treated as a contradiction of the phase model.
The half we can see is not always the lit half
There are two different halves to keep in mind. One is the half of the Moon facing the Sun. The other is the half facing us on Earth. They are not always the same half. When nearly the whole sunlit face points toward us, we see a full Moon. When the sunlit side points mostly away from us, only a small part may be visible. NASA explains the changing overlap between the lit part and our view as the Moon travels around Earth [2][3].
Try describing a picture without saying that the Moon itself has grown or shrunk. You could say, I can see more of the sunlit part than in the earlier picture. At a full Moon, the visible round face looks lit, but the far side still has lunar night. At a half-looking Moon, about half of the round face in our view is bright. The words whole, half and quarter can become confusing unless you name what you are counting. A flat-looking Moon picture is not a view of every part of the Moon at once.
Define an illuminated hemisphere by the solar direction and an Earth-facing hemisphere by the observer direction. The directly sunlit part visible from Earth is their overlap as projected onto the apparent disk. These are two geometrical selections, not competing descriptions of a single fixed half [2][3]. At full phase the visible disk is approximately fully illuminated; this does not mean the entire spherical surface receives sunlight. At new phase, the illuminated hemisphere faces predominantly away from Earth.
The distinction also prevents misuse of area fractions. A statement that half of the apparent disk looks bright does not, by itself, describe half of the Moon's entire surface or a measured physical area. We do not infer surface areas from image fractions here. The first- and last-quarter appearances are conventionally half-lit views, while the names refer to positions in the phase sequence [1][2]. For explanation, keep the sphere, its sunlit hemisphere and its projected appearance as separate objects in the drawing.
Meet four checkpoints in the changing view
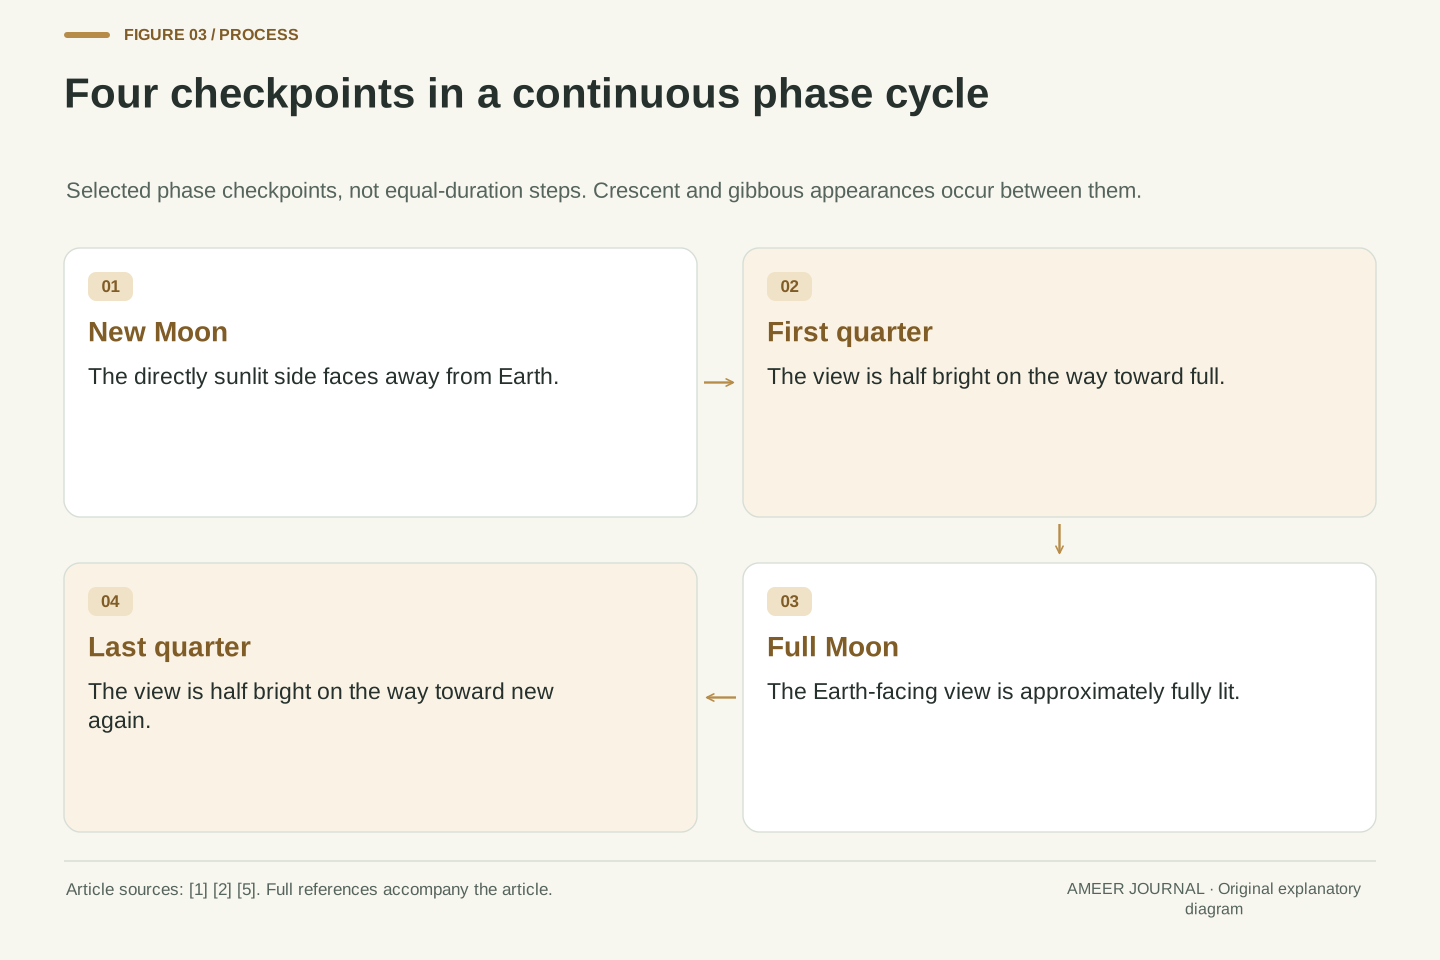
Start with new Moon. Its sunlit side faces away from Earth, so the Moon is usually difficult or impossible to see. It is also in the same part of the sky as the Sun, which is why we use a diagram instead of trying to find it [2]. As the Moon moves on, more of its bright side comes into our view. At first quarter, the view looks half bright. The name quarter belongs to its progress through the cycle, not to a claim that the visible shape is only a quarter-circle [1][2].
At full Moon, the bright face is turned toward Earth. After that, less of the sunlit part comes into view. At third quarter, also called last quarter, the view is half bright again, at a different point in the sequence. Then it continues toward new Moon. These four names are checkpoints in a continuous change [2][5]. They are not four different moons, and the real Moon does not jump from one picture to the next. A picture book pauses the story so we can talk about it.
The primary sequence can be described through new, first-quarter, full and last-quarter phase. Near new Moon, the Sun and Moon occupy similar directions from Earth's viewpoint and the lunar dayside faces away. Near full Moon, their directions are opposed and the Earth-facing side is illuminated [2]. These are relative configurations, not an instruction to aim an instrument near the Sun. The article uses diagrams for near-Sun configurations throughout.
At the quarter phases, the Moon appears approximately half illuminated from Earth. NASA explains first quarter as a quarter of the way through the monthly journey and last quarter as the later half-lit configuration [2]. Royal Observatory material distinguishes the primary phases as particular moments within a continuous cycle [5]. Do not represent each named checkpoint as lasting a fixed week. The diagrams select useful states for explanation, while the actual geometry and apparent illuminated fraction change between them. The names locate the view in a repeating sequence rather than assigning a different physical object to each state.
Crescent, gibbous, waxing and waning
Between new Moon and first quarter, the bright view is a crescent: less than half of the round face looks lit. Between first quarter and full, more than half looks lit but it is not yet full. That shape is called gibbous. The word waxing tells us that the visible sunlit portion is growing through the sequence. After full Moon, the visible bright portion shrinks, which is called waning [1][5]. Growing and shrinking describe the appearance, not the size of the rocky Moon.
Put the names together and you get eight familiar stages: new, waxing crescent, first quarter, waxing gibbous, full, waning gibbous, third quarter and waning crescent [1][2]. You do not need to memorize them in one sitting. Start with whether the bright part looks less than half, about half, more than half, or full. Then ask whether earlier and later pictures show it increasing or decreasing. That second question needs a sequence. One picture without its place in the story may not tell you everything you want to know.
Crescent and gibbous classify the approximate visible illuminated portion, while waxing and waning specify its direction of change over the phase cycle [1][5]. A crescent is between new and a half-lit appearance; a gibbous view is between a half-lit appearance and full. Adding the direction produces the waxing and waning versions on either side of full phase. This is a classification of appearance and progression, not a physical expansion or contraction of the Moon.
The conventional eight-stage sequence is new, waxing crescent, first quarter, waxing gibbous, full, waning gibbous, last quarter and waning crescent [1][2]. It samples a continuously changing geometry. An adult can first establish the shape category, then use ordered observations to discuss the trend. Do not make a universal waxing-versus-waning rule from the bright region's left or right position in an arbitrary photograph: NASA documents that observers in different hemispheres see the same phase from different orientations [3]. The chronological context is more robust than an unexplained image-side mnemonic.
A Moon cycle and an orbit use different clocks
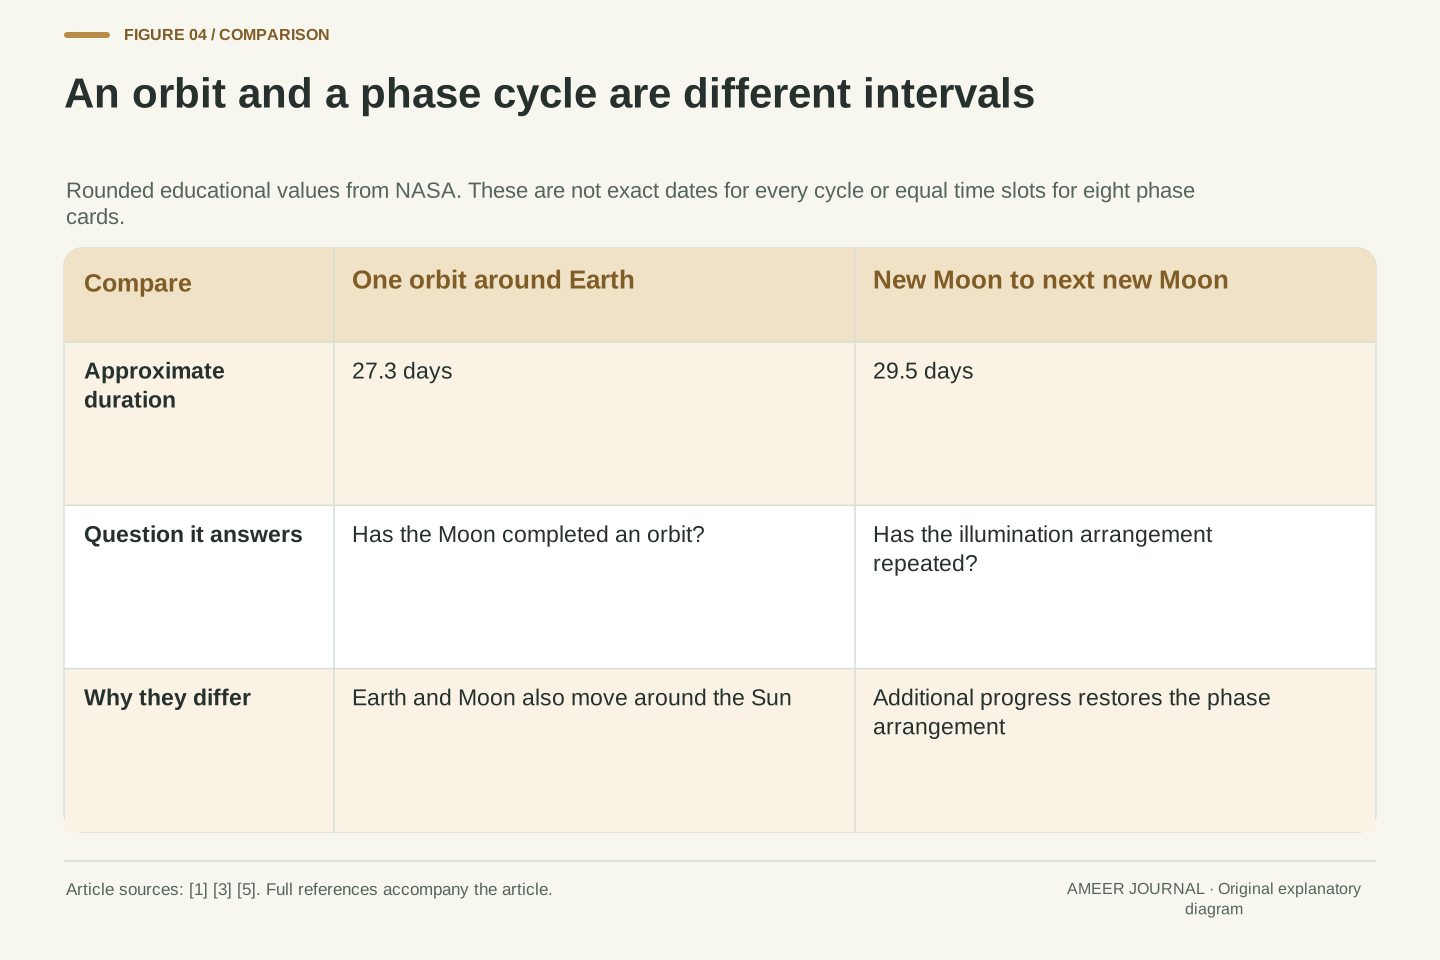
NASA gives about 29.5 days from one new Moon to the next new Moon. It also gives about 27.3 days for the Moon to travel once around Earth [1][3]. Those numbers answer different questions. While the Moon makes that trip, Earth and Moon also move around the Sun. After one orbit, the sunlight therefore meets the Moon from a changed direction. The Moon needs a little more time to return to the same phase arrangement [3]. It has not forgotten to follow the calendar.
Imagine making eight cards for the eight phase names. The cards are useful labels, but eight cards do not mean that each stage lasts exactly the same number of days. Nor must a new Moon happen on the first day of a calendar month. The Royal Observatory explains that the phase cycle and our calendar months do not line up exactly [5]. For a picture book, put the cards in order without adding invented dates. If you later use real dates from an adult-chosen source, keep those dates with the pictures they actually describe.
Distinguish the approximately 27.3-day orbital period from the approximately 29.5-day repetition of the illumination configuration. NASA attributes the difference to Earth and Moon progressing around the Sun during a lunar orbit, so the solar direction has changed when the Moon completes that orbit [3]. The phase cycle therefore requires additional orbital progress. The rounded values are descriptive averages in this educational explanation, not an exact prediction of the interval between every pair of named events.
An eight-card teaching set is a categorical sampling device, not a partition into eight equal time bins. Royal Observatory material describes new, quarter and full phases as instants and identifies the mismatch between a lunar phase cycle and a civil calendar month [5]. No equal-duration arithmetic is used to assign dates or rise times here. A learner can order the stages before considering time intervals, and a later observation record can preserve actual dates separately. This keeps the sequencing lesson from quietly becoming an unsupported lunar calendar.
Make a two-view paper model with a grown-up
You can explore the idea with paper and crayons. Ask a grown-up to draw a small Earth near the centre of a page and a Sun symbol well to the left. Add four separate circles for the Moon at four places around Earth. This is an imaginary view from above, with distances and sizes greatly simplified. In each Moon circle, mark the half facing the Sun symbol as sunlit. Keep that rule the same in all four places. NASA's phase diagrams use the changing Sun-Earth-Moon arrangement to explain the views [2].
Now make a second row labelled view from Earth. For each position above, discuss which sunlit part faces the Earth symbol. The Moon on the Sun's side gives a new-Moon view; the one on the opposite side gives a full-Moon view. The two side positions give half-looking views. A grown-up can compare your drawing with the article diagrams and help label the checkpoints. Nobody needs to shine a lamp into eyes or find the real Sun. The paper model is a thinking aid, not a scale map of space.
The proposed paper model separates orbital geometry from observer appearance. An overhead view places the Sun direction to one side, Earth near the centre and the Moon at four representative orbital positions. Mark the Sun-facing side consistently before attempting the Earth-view projection. Then create a distinct row for the appearance seen from the Earth position. NASA's phase explanation explicitly connects the relative positions with those appearances [2]. The drawing is hypothetical, not a reproduction of measured positions at a stated date.
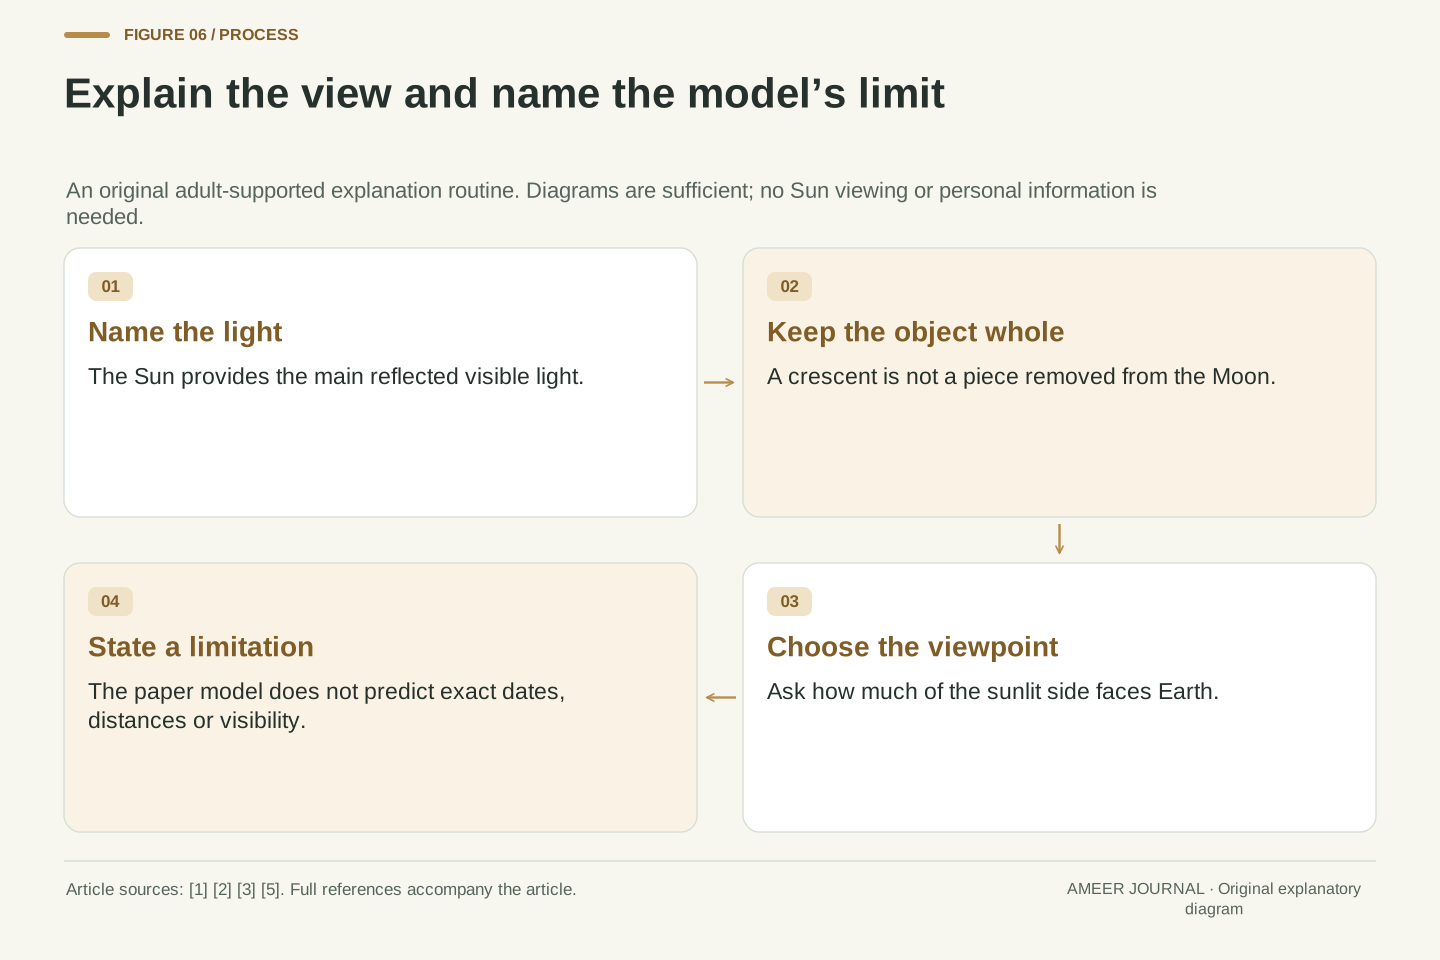
Two limitations deserve an adult's explanation. First, circles on paper represent three-dimensional spheres and an orbit rather than a literal flat system. Second, placing every body exactly on one drawing plane suppresses the Moon's orbital inclination, which matters for eclipses [2]. The model should therefore explain ordinary illumination views without claiming an eclipse at every new or full Moon. It is not to scale and does not predict local visibility, lunar distances or event times. Its value is the disciplined distinction between the overhead arrangement and the view available to an observer on Earth.
Ordinary phases are not Earth’s shadow crossing the Moon
A crescent can look as though somebody covered part of a bright circle. That does not mean Earth's shadow is covering the Moon during every crescent. NASA says ordinary Moon phases are not caused by Earth's shadow. They come from our changing view of the Moon's day and night sides [3]. The part facing away from the Sun has lunar night. Its darkness does not require Earth to sit between that part and the sunlight.
A lunar eclipse is different: Earth's shadow affects the Moon then [3][5]. Our flat paper drawing can accidentally make special alignments look routine. NASA explains that the Moon's orbit is tilted, so a new Moon usually passes near the Sun in our sky rather than directly across it [2]. This is another reason to label the drawing as simplified. You do not need to observe an eclipse to understand phases, and you must not try to look at the Sun to check the alignment. Keep this part of the investigation on the page.
The mechanism of ordinary phases is viewing geometry applied to a partly illuminated sphere, not regular occultation of sunlight by Earth. NASA explicitly distinguishes phase changes from lunar eclipses, during which Earth's shadow does affect the Moon [3]. In an ordinary crescent configuration, much of the Earth-facing side is experiencing lunar night while more of the far side receives direct sunlight. Calling this Earth's shadow would substitute the wrong intervening body for the actual orientation of the lunar surface.
Eclipse geometry is also a limitation of a coplanar classroom diagram. NASA notes that orbital inclination usually keeps the new Moon from passing directly between the apparent Sun and Earth [2]. A diagram with oversized bodies and all positions on one line can falsely imply a special alignment every cycle. State that simplification rather than allowing it to become a prediction. This article explains the distinction, not eclipse-viewing procedures. No part of the activity involves inspecting the real Sun, seeking a thin crescent close to it, or using optical equipment to test an alignment.
The same phase can look differently turned
People in the Northern and Southern Hemispheres see the same Moon phase, but from different angles. NASA explains that the bright part can look upside down compared with the view someone is used to [3]. That is why a picture with the bright crescent on the other side is not automatically wrong. Ask where the picture fits in the sequence and how the view is turned. A crescent's place on the left or right of a page is not a rule for everybody on Earth.
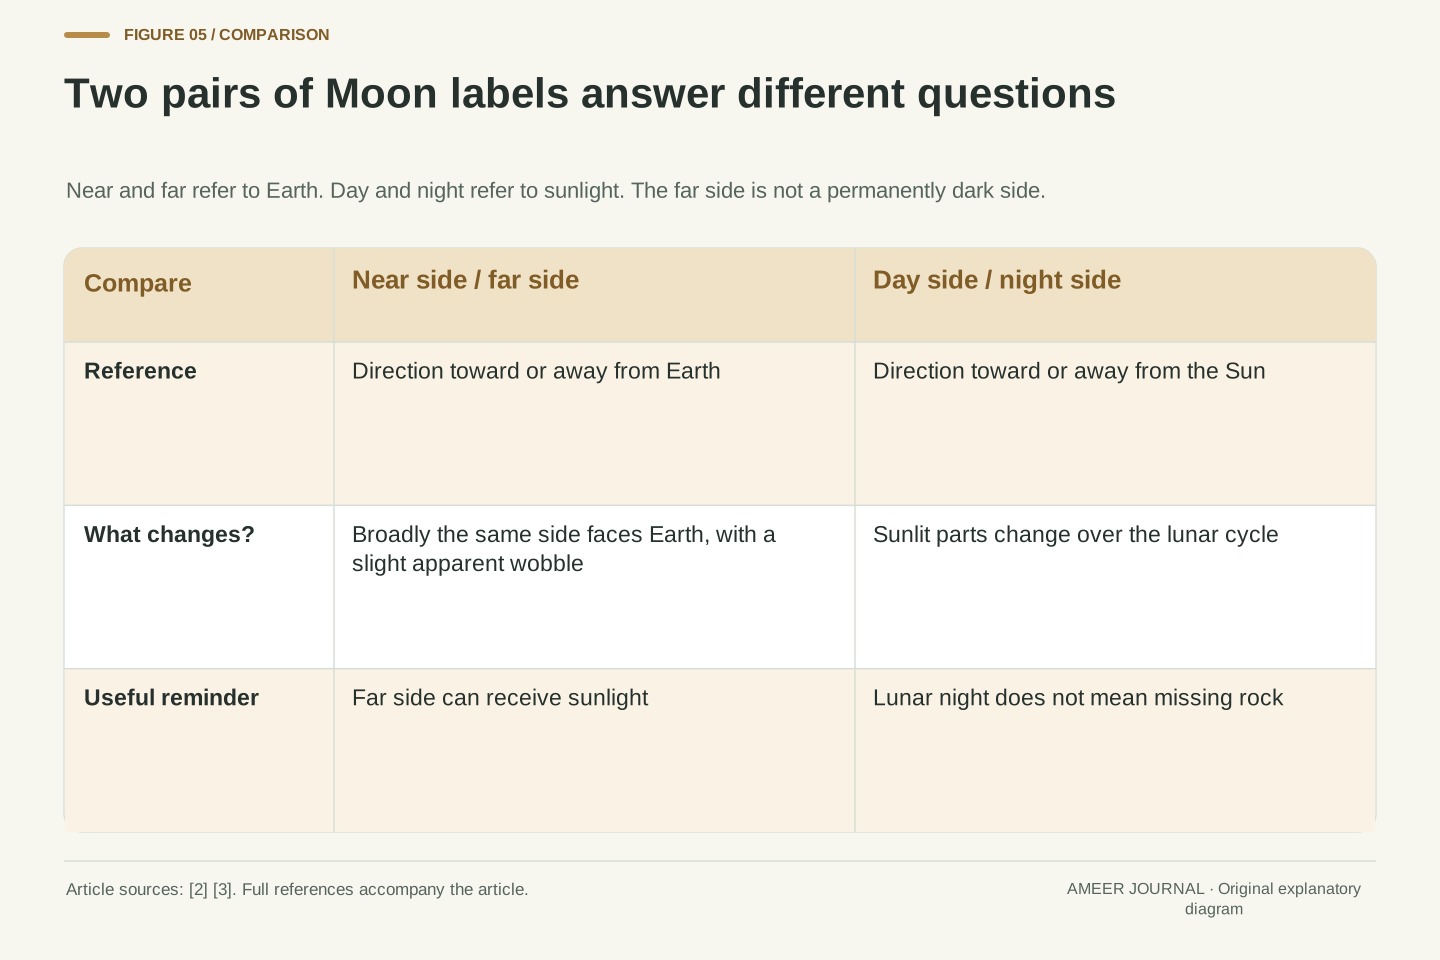
There is another naming trap: the far side of the Moon is not a permanently dark side. It receives sunlight too. The Moon turns once as it travels once around Earth, so roughly the same near side stays facing us [2][3]. Its day and night still change. Near side and far side describe which way a part faces relative to Earth; day side and night side describe the sunlight. These are different pairs of labels, just like the two halves we separated earlier. Knowing which question a label answers makes the picture easier to explain.
Phase and orientation should be recorded separately. NASA describes observers north and south of the equator as seeing the same phase from different angles, with opposite-looking orientations in its illustrated example [3]. The article therefore avoids a globally fixed left-lit or right-lit phase rule. A rotated image can preserve the same illuminated fraction and phase classification while changing the bright region's position on the page. This is a viewpoint issue rather than a different lunar illumination cycle.
Also separate near/far from day/night. The Moon's approximately synchronous rotation keeps broadly the same side directed toward Earth, while solar illumination changes over the cycle [3]. NASA's phase page describes libration, which allows the apparent view to wobble slightly rather than remaining perfectly fixed [2]. The far side is therefore not correctly named a permanently dark hemisphere. No detailed libration calculation is needed here; the necessary distinction is that Earth-facing geography and sunlight-facing geography answer different questions, even when both are illustrated using halves of a sphere.
Keep a Moon picture book without a viewing challenge
The diagrams alone can become your Moon picture book. Draw a bright shape, write the phase name with a grown-up, and add a sentence about why that much sunlit Moon faces Earth. If an adult chooses to show you real Moon pictures, keep the source and date beside them when those are known. A drawing based on a diagram should be labelled as a model. A picture from another person should not be described as something you observed yourself. You can build a careful story without collecting a photograph every night.
Optional sky watching should be with a grown-up from a safe place, only when the Moon is already easy to identify away from the Sun. No equipment is needed, and there is no reason to search near the Sun, go out alone or lose sleep. Clouds or an unsuitable time can mean no observation. NASA explains that the Moon can also be in the daytime sky and that its rise time changes [3]; missing it at one time does not mean it vanished. Keep any notes private, without posting a child's name, location or routine.
Use the picture book to distinguish evidence types. A model drawing explains a relationship; a dated source photograph records a particular appearance; a personal observation records only what was actually seen under stated conditions. These categories should not be silently exchanged. A child does not need a complete nightly dataset, and gaps must not be filled with invented observations. Source-selected pictures can support the whole activity when outdoor observation is unsuitable or unnecessary.
If an adult elects to observe, choose a safe location and an already identifiable Moon well away from the Sun, with no optical equipment, solitary night activity or sleep disruption. NASA explains that the Moon can be visible during daylight and that rise and set times change through its orbit [3]. Consequently, non-detection at a fixed time does not establish a particular phase. Keep any record private and minimal; no names, precise positions, contact details or uploaded routines are required. The activity is an optional qualitative observation, not a challenge to achieve a complete sequence.
Explain a Moon picture with three linked ideas
Return to the two imaginary pictures from the beginning: one full and one crescent. First name the light source: the Sun supplies the main light reflected by the Moon [1][5]. Next name the object: the Moon remains a round world, even when a small bright shape is all you notice. Finally name the view: as the Moon moves around Earth, a different amount of the sunlit half faces us [2][3]. Those three ideas work together. The Moon does not have to lose a piece or turn its light down.
Try one question at a time with a grown-up. Does a half-looking Moon mean half the Moon disappeared? Does full Moon mean every part of the whole sphere has day? Does a crescent always belong on one side of the page? Each answer becomes easier when you point to the object, light and viewpoint separately. If you want to change an answer, use the model and explain the change. There is no score to beat. A useful picture book ends with better questions and explanations, not a race to remember every name.
The completed explanation combines reflected illumination, three-dimensional shape and changing observer geometry. The principal light reaches the Moon from the Sun; an approximately spherical body has a directly illuminated side; and Earth's view of that side changes during the lunar phase cycle [1][2][3][5]. This chain distinguishes the article from a general shadow activity: its central variable is the overlap of visible and illuminated hemispheres, not the length of an object's cast shadow on a screen.
An adult can check understanding with explanations rather than scores: ask why a crescent does not imply missing rock, why full phase does not illuminate the entire lunar surface, and why image orientation is not a universal phase label. Also ask which limitations belong to the paper model: scale, inclination and exact visibility are deliberately excluded. The learner should be able to preserve the main mechanism while naming those limits. That is a sound basis for later learning about lunar motion, eclipses and observing records without claiming that this introductory picture sequence already measures them.
Sources & further reading
Explore the references behind this guide. External pages may change after our review.
- What Are the Moon’s Phases? | NASA Space Place – NASA Science for KidsNASA Space Place · Accessed 6 Nov 2026
- Moon Phases - NASA ScienceNASA · Accessed 6 Nov 2026
- Top Moon Questions - NASA ScienceNASA · Accessed 6 Nov 2026
- What are the names of full moons throughout the year? | Royal Museums GreenwichRoyal Museums Greenwich · Accessed 6 Nov 2026
Article updated 6 Nov 2026.