What you’ll take away
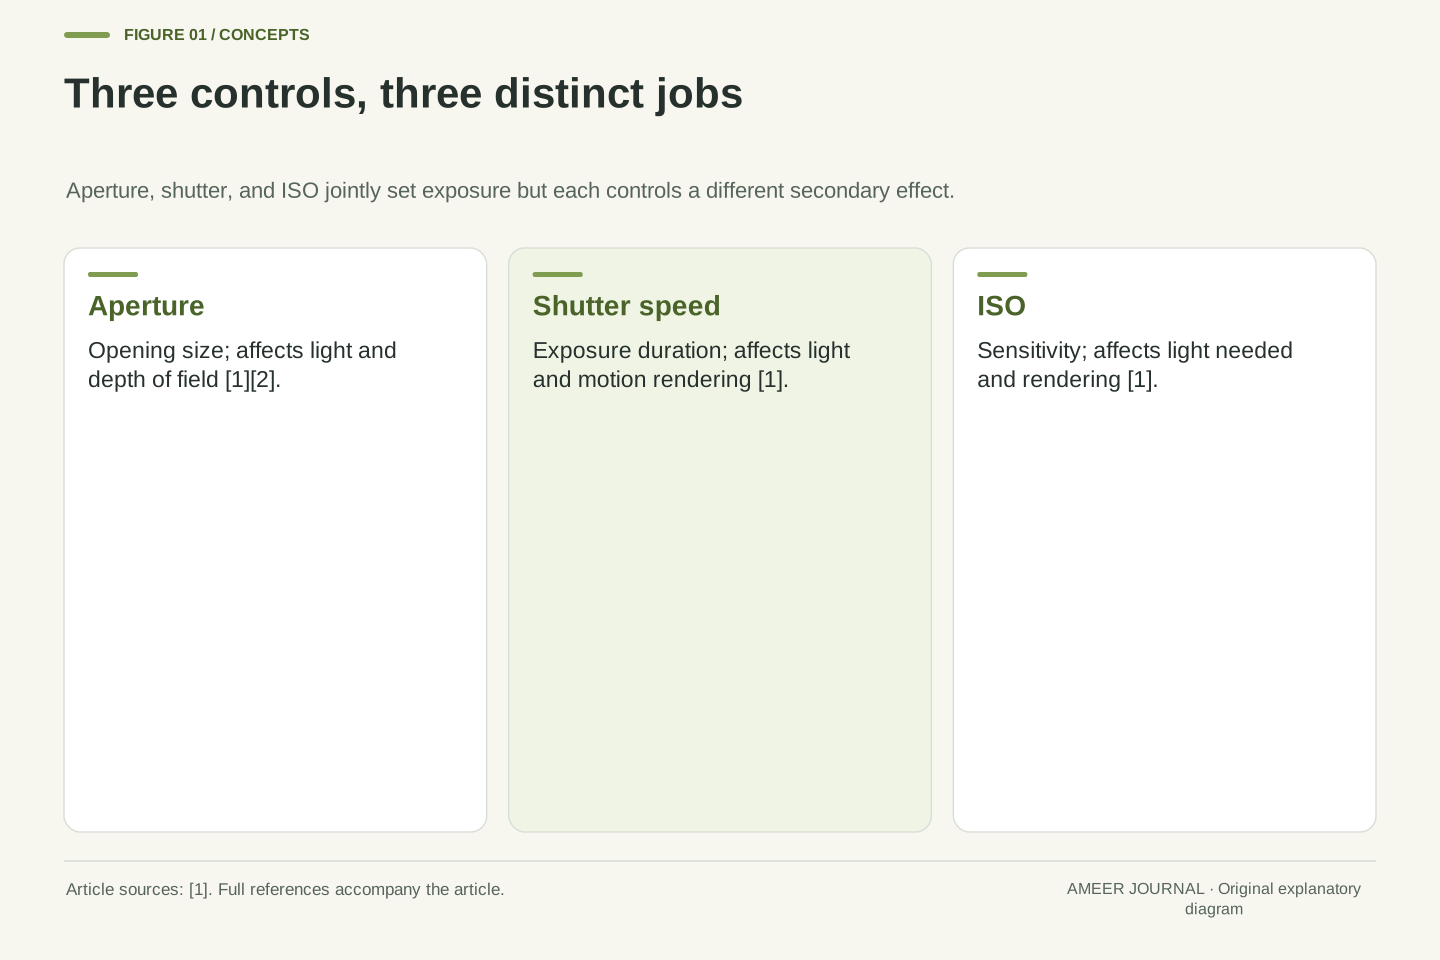
- Aperture, shutter speed, and ISO are linked: changing one usually requires compensating with another to keep brightness correct [1].
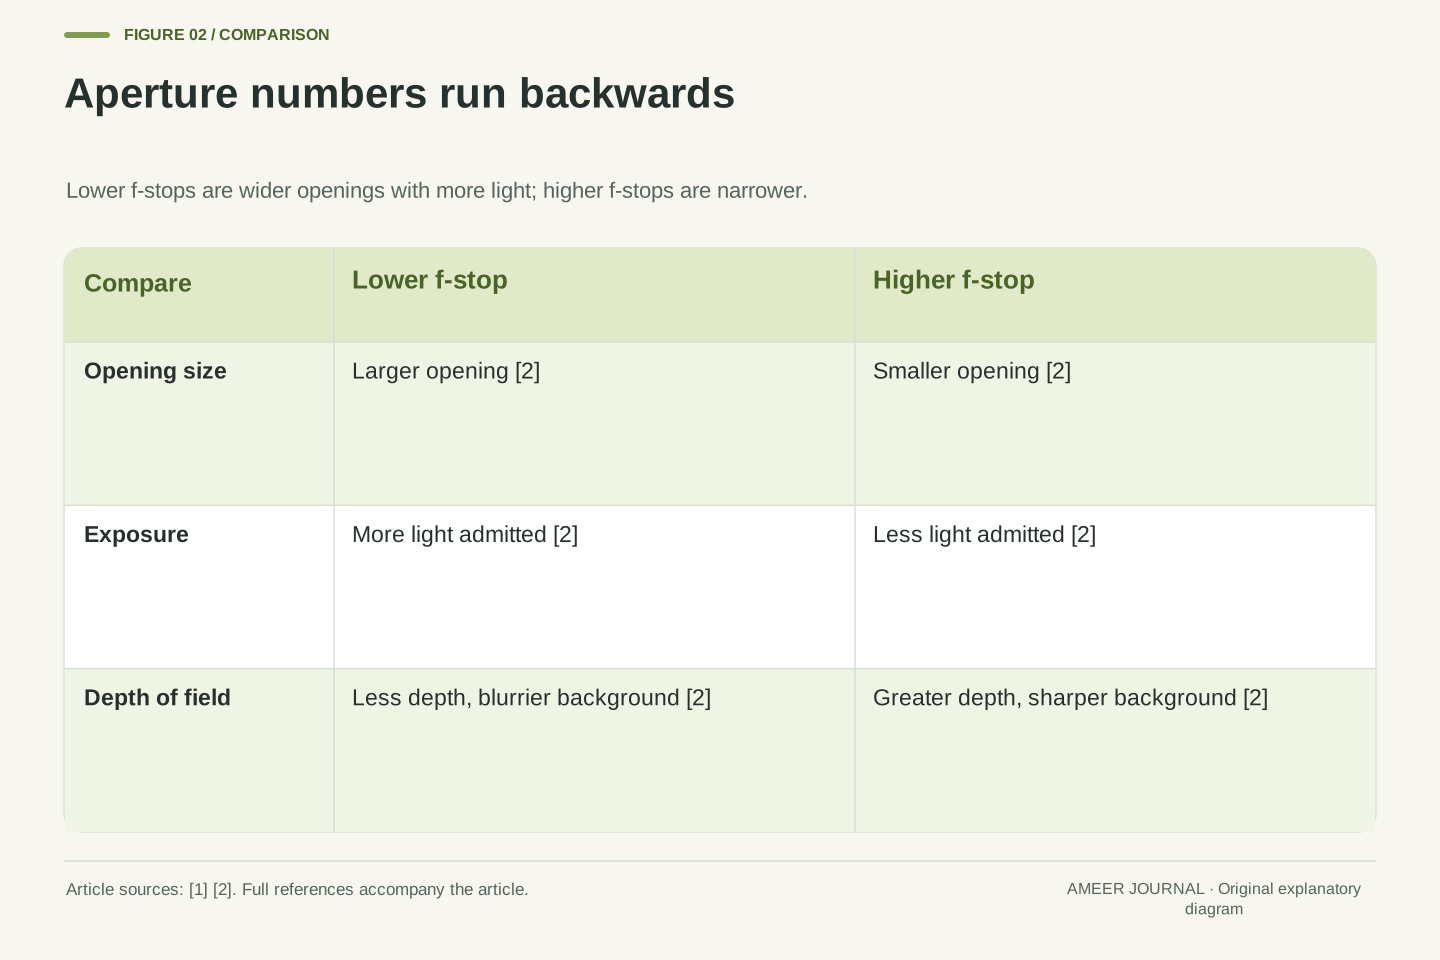
- Lower f-stops mean larger openings, more light, and less depth of field; higher f-stops mean smaller openings, less light, and greater depth of field [2].
- Fast shutter speeds freeze motion while slow speeds show motion as blur, independent of brightness alone [1].
- Higher ISO means less light is needed but tends to reduce colour saturation and increase grainy noise, without quantified camera-specific values in the sources [1].
- Sony ILCE-7M2 manual-mode dial, ISO AUTO, and manual shift instructions apply only to that specified camera and mode [3].
Light Must Travel Through the Lens and Shutter
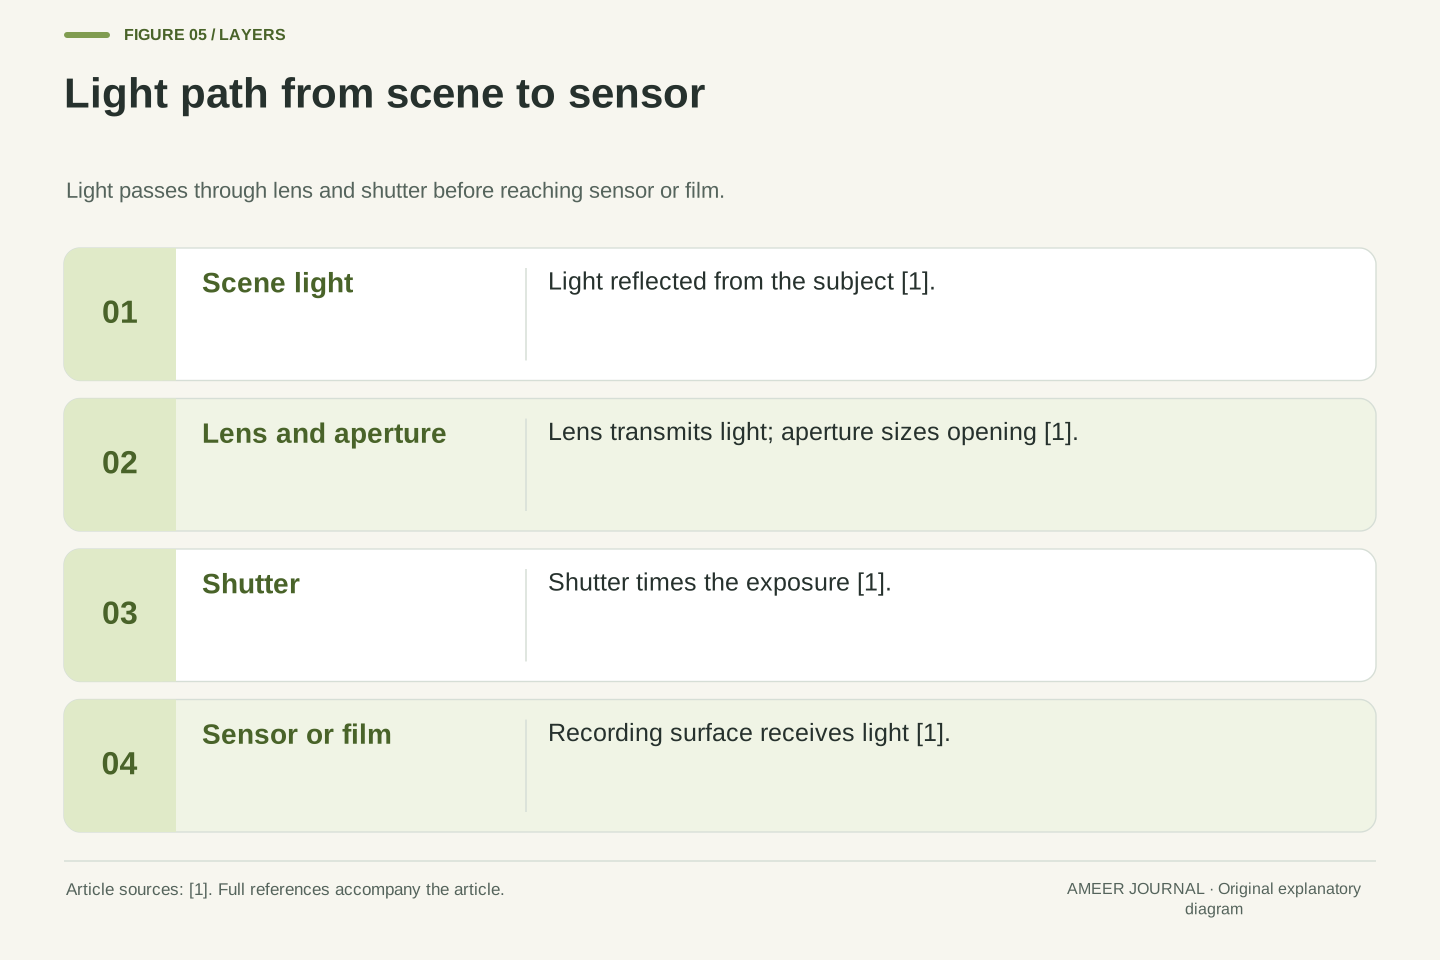
Every photograph begins with light travelling through a lens and then through a shutter before it reaches a sensor or a frame of film [1]. The lens and shutter control how much light reaches that recording surface, so exposure is not created by one control alone. Thinking of the path first helps you see why changing any one setting affects the others.
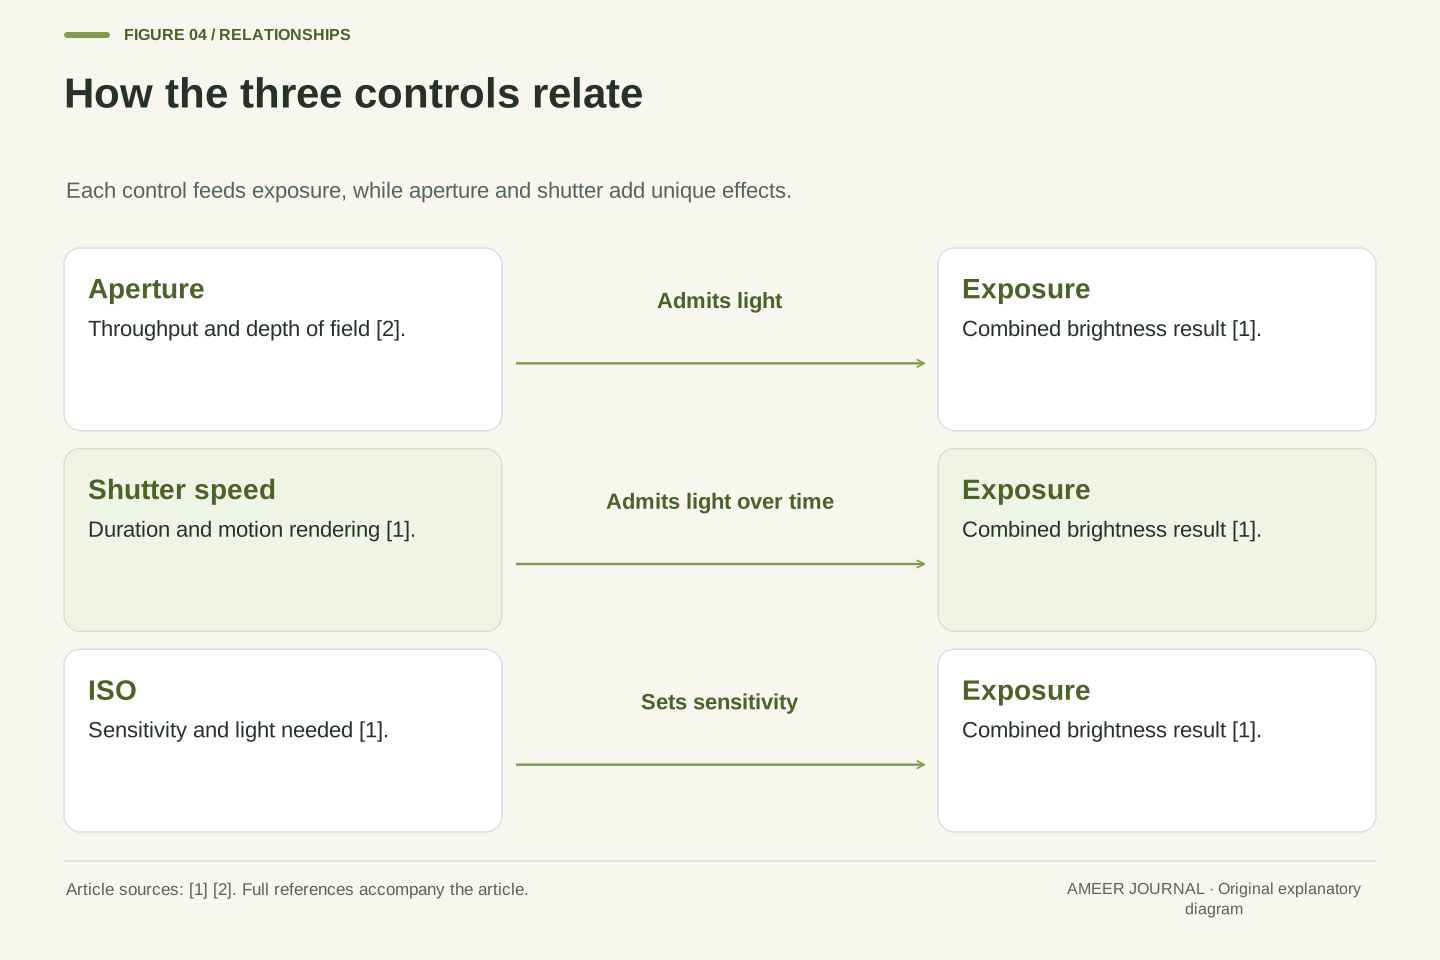
The aperture is the opening inside the lens, while the shutter is a timing mechanism [1]. A wider opening admits more light at once, and a longer shutter opening admits light for more time. ISO then describes how sensitive the film or sensor is to the light that arrives [1]. Brightness in the final image is the combined result of those three factors.
A useful way to picture the system is as a chain with three links. The lens decides the size of the opening, the shutter decides the duration, and ISO decides the sensitivity of the recording surface [1]. If you change one link, you must usually adjust another link to keep the same overall brightness. That linked behaviour is the central idea behind manual exposure.
This chain also explains why two photographs can have the same brightness but look completely different. One might use a wide aperture and a fast shutter, while another uses a narrow aperture and a slow shutter. The total light can be similar, yet the depth of field and the rendering of motion will differ because the controls do different jobs [1][2].
Exposure formation can be described as light transmission through an optical aperture followed by temporal gating by a shutter and subsequent sensitivity scaling at the recording medium [1]. The diaphragm determines the effective entrance pupil area, the shutter determines integration time, and ISO determines the nominal sensitivity assigned to the sensor or film. These are physically distinct mechanisms that jointly determine the recorded signal level.
The aperture is a variable mechanical diaphragm inside the lens, calibrated in f-stops [1][2]. The shutter controls how long light passing through the lens is allowed to reach the sensor or film, expressed most often as a fraction of a second [1]. ISO refers to the light sensitivity of the film or image sensor and can be changed per shot in digital systems, unlike a roll of film locked to one sensitivity [1].
Because the three parameters are coupled, a change in one requires compensation in at least one other to maintain a constant exposure value, assuming scene luminance is fixed [1]. This coupling does not imply interchangeability of effects. Aperture additionally modulates depth of field, shutter additionally modulates temporal integration of moving subjects, and ISO additionally affects the qualitative rendering associated with higher sensitivity [1][2].
The distinction between captured light and sensitivity is important for precise reasoning. Aperture and shutter govern the quantity of light delivered to the sensor over time, whereas ISO governs how that delivered light is treated by the recording system [1]. Conflating these mechanisms leads to the common error of treating ISO as if it were another opening or timing control, rather than a sensitivity setting.
Aperture Numbers Run Backwards: Small f-Numbers Mean Wide Openings
Aperture is written as f-numbers such as f/1.4, f/2, f/2.8, f/4, f/5.6, f/8, f/11, and f/16 [2]. The numbering feels backwards at first because lower f-stops represent larger openings and give more exposure, while higher f-stops represent smaller openings and give less exposure [2]. Remembering that inversion removes much of the confusion when you read a lens or a camera display.
In practical terms, opening up means moving to a smaller number, for example from f/11 to f/5.6, and closing down means moving to a larger number [1]. A fast lens can open very wide, with a maximum aperture such as f/2.8, f/2, f/1.8, or f/1.4, while many lenses close down to somewhere between f/22 and f/32 [1]. A full stop difference means half as much or twice as much light is allowed to enter [1].
The maximum aperture is the widest opening a lens can achieve, and it is listed on the lens barrel for Nikon lenses [2]. Some zoom lenses list a range such as f/3.5-5.6, meaning the maximum aperture differs at the two ends of the zoom range [2]. Other lenses maintain the same largest aperture throughout the zoom range and therefore list only one number [2]. Checking that marking tells you the widest opening available before you plan a shot.
Aperture therefore has two linked consequences: it changes exposure and it changes depth of field [2]. A lower f-stop admits more light and produces less depth of field, while a higher f-stop admits less light and produces greater depth of field [2]. You cannot choose aperture for brightness alone without also accepting its effect on how much of the scene appears sharp.
Aperture notation uses f-stops in which the numerical value is inversely related to physical opening diameter [1][2]. Lower f-stops correspond to larger apertures and greater exposure, higher f-stops to smaller apertures and lower exposure [2]. The relationship derives from lens focal length and aperture diameter, which is why the scale is counterintuitive to learners expecting larger numbers to mean larger openings [1].
A one-stop change in aperture alters admitted light by a factor of two, in the sense that a full stop difference means half as much or twice as much light reaches the sensor or film [1]. Fast lenses are defined by very wide maximum apertures such as f/2.8, f/2, f/1.8, or f/1.4, whereas closing down typically extends to between f/22 and f/32 depending on the lens [1]. These ranges are descriptive of the cited examples, not universal specifications for all lenses.
Maximum aperture is lens-specific and may vary across a zoom range. A marking such as f/3.5-5.6 indicates different maximum apertures at opposite ends of the zoom range, while a single number indicates a constant maximum aperture across the range [2]. This matters because the widest available opening constrains both exposure options and the shallowest achievable depth of field at a given focal length.
Aperture selection must therefore be evaluated on two axes simultaneously: photometric throughput and depth of field [2]. Increasing aperture diameter increases light delivery and reduces depth of field, while decreasing diameter reduces light delivery and increases depth of field [2]. Any exposure calculation that ignores the second axis will be incomplete as a photographic decision, even if the resulting brightness is correct.
Shutter Speed Controls Time, and Time Controls Motion
Shutter speed controls how long light is allowed to hit the sensor or film, and it is usually expressed as a fraction of a second [1]. A very fast speed such as 1/1000 second will freeze most action in its tracks, while a slow speed such as 1/30 second will blur a person casually strolling by [1]. The shutter does not change the size of the opening; it changes the duration of the recording.
Cameras offer a wide range of shutter speeds, from as long as 30 seconds to as short as 1/8000 second [1]. At the fast end, the recording window is brief, so a moving subject changes position only slightly during exposure. At the slow end, the subject moves farther across the frame while light is still being recorded, so its image spreads out as blur. That spread is motion blur, and it is a direct consequence of integration time.
Shutter speed also interacts with aperture to maintain exposure. Using a low f-stop means more light enters the lens, so the shutter does not need to stay open as long and a faster shutter speed can be used [2]. Using a high f-stop means less light enters, so the shutter needs to stay open a little longer, which translates into a slower shutter speed [2]. The same brightness can therefore be reached with different combinations.
When you choose a shutter speed, ask what motion story you want. A fast shutter preserves a crisp instant, which suits a subject whose position matters more than the sense of movement. A slow shutter records a trail, which can communicate speed or activity but sacrifices sharp detail on the moving subject. Neither choice is correct in isolation; the choice depends on the subject and the intended effect [1].
Shutter speed is a temporal parameter specifying the interval during which the sensor or film is exposed to light transmitted through the lens [1]. It is conventionally expressed as a fraction of a second, with examples ranging from 1/1000 second for freezing action to 1/30 second for blurring a strolling person [1]. The cited range of available speeds extends from 30 seconds to 1/8000 second [1].
Motion rendering follows from integration time relative to subject displacement. During a short exposure, a moving subject traverses a small distance on the sensor, producing a compact image. During a long exposure, the subject traverses a larger distance, producing an extended image perceived as motion blur [1]. Shutter speed therefore controls the temporal sampling window, not the spatial extent of the aperture.
Shutter and aperture are photometrically substitutable within limits but are not functionally equivalent. A low f-stop admits more light and permits a faster shutter speed for the same exposure, while a high f-stop admits less light and requires a slower shutter speed [2]. The substitution preserves total exposure while altering depth of field and motion rendering, which is why exposure equivalence does not imply pictorial equivalence.
Selection of shutter speed should be framed as a decision about acceptable displacement during exposure. Fast speeds prioritise positional sharpness of moving subjects, slow speeds prioritise depiction of movement itself [1]. The appropriate value depends on subject velocity, direction relative to the camera, and the desired balance between sharpness and motion cues, rather than on brightness alone.
ISO Changes Sensitivity, Not the Amount of Light
ISO refers to the light sensitivity of film or an image sensor [1]. With film, sensitivity was effectively locked for the length of a roll, often 200 or 400, while with digital cameras the sensitivity rating can be changed for every shot if desired [1]. That per-shot flexibility is a major practical difference between the two systems.
The lower the ISO, the more light is needed for a proper exposure, and the higher the number, the less light is needed [1]. Doubling or halving ISO means needing half as much or twice as much light [1]. For example, moving from ISO 100 to ISO 800 changes the light requirement substantially, which is why a higher ISO can allow a faster shutter or a narrower aperture in dim conditions.
Higher ISO is not free of trade-offs. As sensitivity rises, the source notes a tendency to lose some colour saturation and gain some noise, which gives pictures a grainy look [1]. The sources do not provide measured noise values for any specific camera, so you should treat ISO effects qualitatively rather than expecting a precise numerical prediction for a particular model. The direction of the trade-off is clear, but its magnitude in a given photograph depends on the camera and conditions.
Think of ISO as the last lever to pull when aperture and shutter cannot solve the problem alone. If the scene is dark and you cannot open the aperture further or slow the shutter without blurring motion, raising ISO reduces the light needed [1]. If the scene is bright, lowering ISO increases the light needed and can allow a wider aperture or slower shutter. ISO should be chosen with awareness of its qualitative costs, not treated as a neutral brightness dial.
ISO denotes the nominal light sensitivity of the recording medium [1]. In film systems sensitivity was fixed for a roll, commonly 200 or 400, whereas digital systems permit per-exposure adjustment [1]. This architectural difference means ISO in digital photography is a selectable exposure parameter rather than a fixed property of the loaded medium.
The photometric relationship is inverse: lower ISO requires more light for proper exposure, higher ISO requires less [1]. Doubling or halving ISO halves or doubles the light requirement respectively [1]. ISO therefore participates in the exposure balance alongside aperture and shutter, but through sensitivity rather than through optical throughput or integration time.
The cited source describes qualitative degradation with increasing sensitivity, specifically reduced colour saturation and increased noise producing a grainy appearance [1]. No measured noise figures, signal-to-noise ratios, or camera-specific benchmarks are provided in the sources, and none should be inferred. The supported claim is directional and qualitative: higher ISO tends to involve these costs, without a quantified magnitude for any particular device.
Conceptually, ISO should be distinguished from captured light. Aperture and shutter determine how much light is delivered; ISO determines the sensitivity at which that light is recorded [1]. Raising ISO does not increase the light reaching the sensor. It changes the sensitivity setting so that less light is required, with the qualitative trade-offs noted above [1].
The Three Controls Are Always Linked
Aperture, shutter speed, and ISO are closely connected, and that connection is the basis of every photograph [1]. They are always linked, so photographers are always adjusting shutter speed and aperture for the right exposure and the effect they want [1]. Changing one control without considering the others will usually change brightness, even if that was not your intention.
The balancing act works in both directions. Opening the aperture admits more light, so you may need a faster shutter or a lower ISO to keep brightness constant [1][2]. Slowing the shutter admits light for longer, so you may need a narrower aperture or a lower ISO. Raising ISO reduces the light needed, so you may need a narrower aperture or a faster shutter [1]. Each move creates a compensating move elsewhere.
Auto and program modes can bypass manual balancing by letting the built-in computer do the work [1]. That convenience is useful, but understanding the relationship gives you greater understanding and creative control [1]. When the camera chooses for you, it may prioritise brightness while sacrificing the depth of field or motion rendering you actually wanted. Knowing the links lets you recognise when automation is helping and when it is overriding your intent.
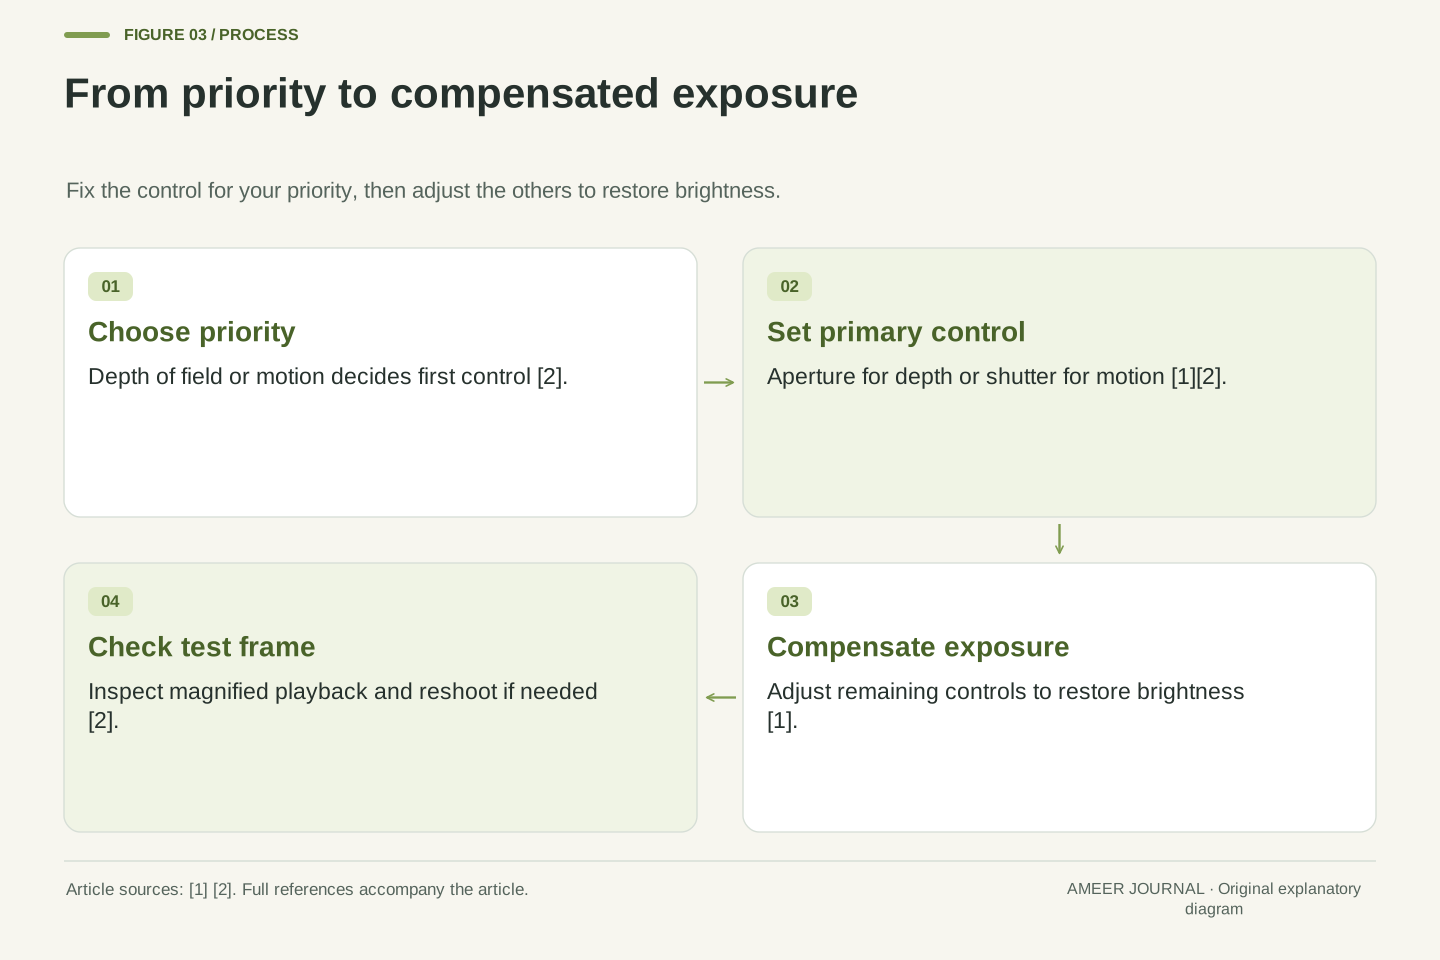
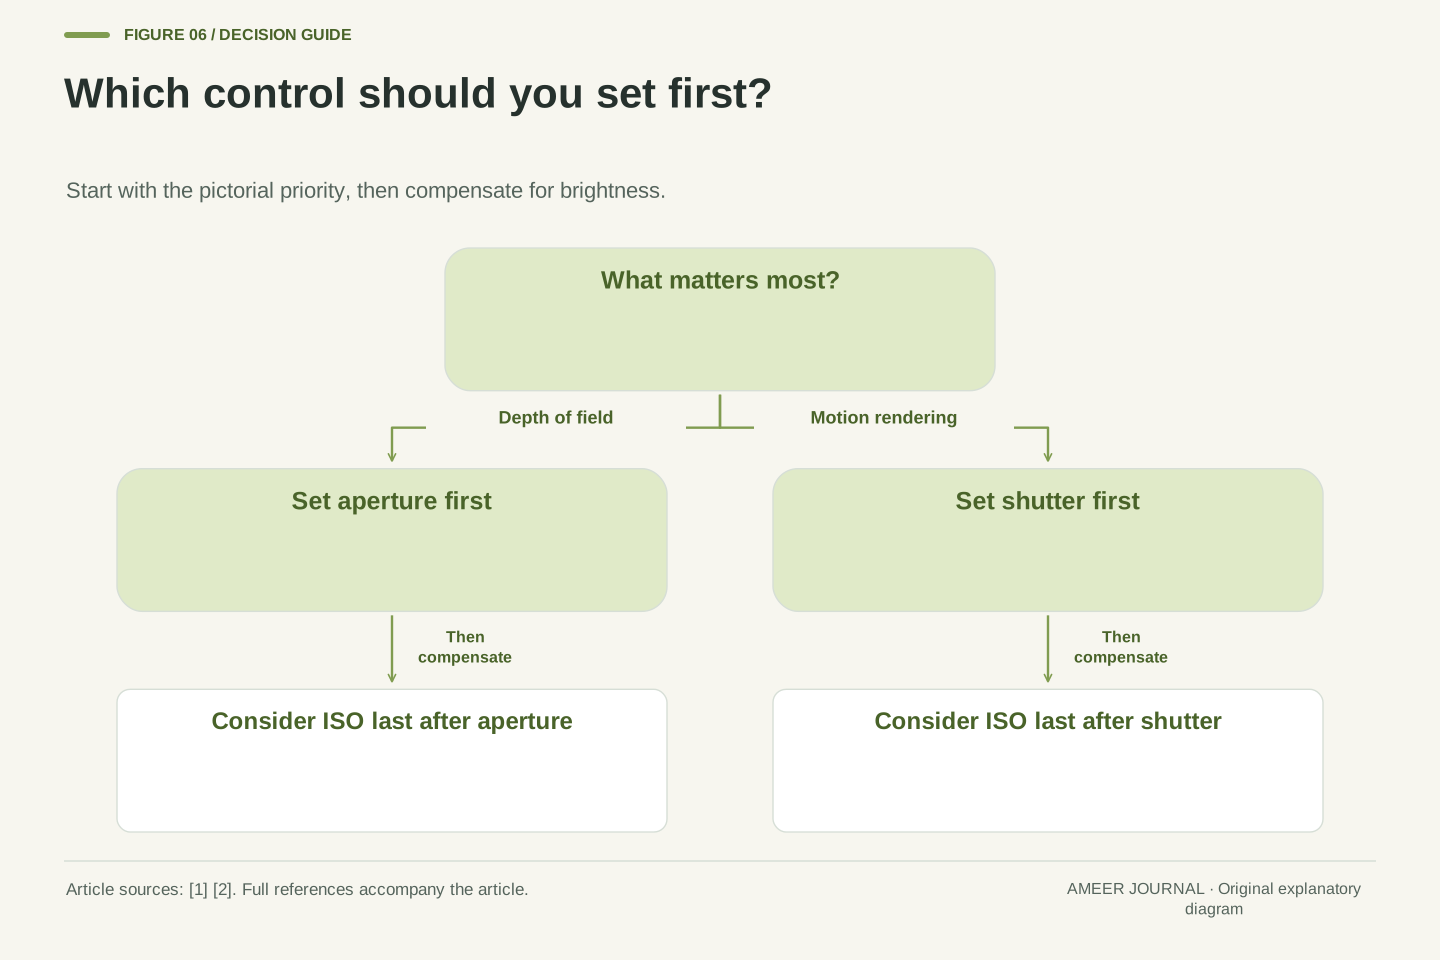
A practical habit is to decide your priority first, then let the other controls follow. If depth of field matters most, choose aperture first and adjust shutter and ISO to restore brightness [2]. If freezing motion matters most, choose shutter speed first and adjust aperture and ISO. If light is scarce, consider ISO with its trade-offs in mind [1]. Priority-first thinking turns a confusing triangle into a sequence of decisions.
The exposure system is a coupled three-parameter system in which aperture, shutter speed, and ISO jointly determine recorded brightness [1]. The source emphasises that the three elements are always linked and that exposure management is a balancing act involving adjustment of shutter speed and aperture for both exposure and intended effect [1]. This coupling is the foundational constraint of photographic exposure.
Compensation logic follows directly from the individual mechanisms. Increasing aperture throughput or shutter integration time increases delivered light, requiring compensation via reduced throughput, reduced integration time, or reduced sensitivity to maintain constant exposure [1][2]. Conversely, increasing ISO reduces the light requirement and permits compensation via reduced throughput or reduced integration time [1]. The system therefore has multiple solutions for a given brightness, differing in depth of field and motion rendering.
Automated modes delegate this balancing to the camera's metering and control logic [1]. Automation can achieve a nominally correct exposure without regard to the photographer's preferred depth of field or motion treatment. Understanding the coupling allows the photographer to predict which secondary effects automation will produce and to intervene when those effects conflict with the intended image.
A priority-based decision procedure resolves the underdetermination of the coupled system. Fix the parameter whose secondary effect is most important, such as aperture for depth of field or shutter speed for motion, then adjust the remaining parameters to restore exposure [1][2]. This procedure converts simultaneous coupling into sequential choice, which is the practical basis of manual and semi-automatic exposure control.
Depth of Field: How Aperture Decides What Looks Sharp
Depth of field is the zone of acceptable sharpness in front of and behind the subject on which the lens is focused [2]. In simple terms, it describes how sharp or blurry the area behind your subject appears [2]. Aperture is the main control discussed here for changing that zone, because the size of the opening affects how much of the scene falls within acceptable sharpness.
The rule is consistent: the lower the f-stop, the larger the opening, the less depth of field, and the blurrier the background [2]. The higher the f-stop, the smaller the opening, the greater the depth of field, and the sharper the background [2]. A wide aperture therefore isolates a subject, while a narrow aperture keeps more of the scene in focus.
Photographers use focus and depth of field to direct attention to what is important and to minimise distractions that cannot be removed from the composition [2]. For classic portraiture, selective focus separates the subject from surroundings by using a large aperture such as f/2.8, creating very shallow depth of field with only the subject, or part of the subject, in focus [2]. For landscape photography, the usual goal is maximum detail from foreground to background, achieved with a small aperture such as f/8 or f/11 [2].
Intermediate depth of field is also possible. Choosing a mid-range f-stop such as f/5.6 and shooting a test frame, then using the magnifying function in playback to check depth of field, lets you adjust and reshoot if necessary [2]. That check matters because depth of field is easier to judge when you inspect the actual frame rather than guessing from the settings alone. Comparisons should keep framing, distance, and output criteria aligned so that aperture is the variable being judged [2].
Depth of field denotes the region of acceptable sharpness extending in front of and behind the plane of focus [2]. Aperture modulates this region monotonically within the cited framework: lower f-stops, representing larger openings, produce less depth of field and blurrier backgrounds, while higher f-stops, representing smaller openings, produce greater depth of field and sharper backgrounds [2].
The mechanism is optical rather than photometric, although aperture simultaneously affects photometric throughput. Depth of field is therefore a secondary effect of aperture that cannot be obtained by adjusting shutter speed or ISO. This non-substitutability is critical: exposure compensation via shutter or ISO preserves brightness but does not replicate the depth-of-field consequence of an aperture change [2].
Application follows from compositional intent. Portraiture uses selective focus with a large aperture such as f/2.8 to achieve shallow depth of field and direct attention to the subject [2]. Landscape photography typically seeks maximum depth of field from foreground to background using a small aperture such as f/8 or f/11 [2]. Intermediate depth of field can be obtained with a mid-range f-stop such as f/5.6, verified by magnified playback inspection and reshooting if needed [2].
Valid comparison of depth-of-field effects requires controlling confounding variables. Framing, subject distance, and output criteria should be aligned when comparing apertures, so that observed differences can be attributed to aperture rather than to changes in viewpoint or reproduction size [2]. Without such alignment, qualitative claims about sharpness zones become unreliable.
Freezing Motion Versus Showing Motion
Shutter speed is the control that most directly decides whether motion is frozen or shown as blur [1]. A speed such as 1/1000 second freezes most action, while 1/30 second blurs a person casually strolling by [1]. The difference is not about brightness; it is about how far the subject moves during the exposure.
A fast shutter is useful when the position of the subject must be sharp. Sports, wildlife, and any scene where a moving subject is the main subject often benefit from a brief exposure that limits displacement [1]. The cost is that a fast shutter admits light for a short time, so you may need a wider aperture or a higher ISO to maintain brightness [1][2]. Freezing motion therefore creates pressure on the other two controls.
A slow shutter is useful when movement itself is part of the message. Blurred motion can suggest speed, activity, or passage of time, but it sacrifices sharp detail on the moving subject [1]. The benefit is that a longer exposure admits more light, allowing a narrower aperture for greater depth of field or a lower ISO [1][2]. Showing motion therefore trades subject sharpness for a different kind of information.
Edge cases arise when both sharpness and motion blur are desired in different parts of the frame. A slow shutter may blur a moving subject while keeping a static background sharp, or a fast shutter may freeze the subject while also freezing background movement. The sources support the basic direction of these effects but do not provide subject-specific shutter recommendations, so you should test with a safe observation task rather than assuming a universal speed for every scene.
Motion rendering is governed by the ratio of subject displacement during exposure to the acceptable image displacement criterion. Fast shutter speeds such as 1/1000 second limit displacement and freeze most action, while slow speeds such as 1/30 second permit sufficient displacement to blur a strolling person [1]. Shutter speed thus encodes a temporal resolution decision independent of exposure level.
The photometric cost of freezing motion is reduced integration time. Maintaining exposure at a fast shutter speed requires increased aperture throughput or increased ISO sensitivity [1][2]. Conversely, slow shutter speeds increase integration time and permit reduced aperture throughput or reduced ISO [1][2]. Motion decisions therefore propagate through the coupled exposure system and affect depth of field and sensitivity-related rendering.
Slow shutter speeds do not blur the entire frame uniformly in effect; they blur moving elements while static elements remain sharp, assuming the camera itself is stable. The sources support the general claim that slow speeds blur moving subjects [1] but do not quantify blur magnitude as a function of subject velocity or direction. Any specific prediction of blur extent for a given scene would exceed the supported evidence.
The decision between freezing and showing motion is therefore a pictorial decision, not a technical correction. Fast speeds prioritise positional information, slow speeds prioritise kinetic information [1]. Because the sources provide only qualitative examples, shutter selection for unfamiliar subjects should be treated as an empirical observation task, with test frames inspected for the intended balance between sharpness and motion cues.
A Hypothetical Worked Example: Same Brightness, Different Pictures
Consider a completely hypothetical example, invented only to show the trade-off logic and not based on testing any real camera. Imagine a bright outdoor scene where you want a correctly exposed photograph of a person standing still, with a busy background you would like to soften. You could choose a wide aperture, a fast shutter, and a low ISO. The wide aperture admits plenty of light, the fast shutter admits it briefly, and the low ISO keeps sensitivity down [1][2].
In that hypothetical setup, brightness could be correct while depth of field is shallow, so the background appears blurry and the person stands out [2]. Motion is also frozen because the shutter is fast, although the person is standing still so that benefit is less important here [1]. The picture prioritises subject isolation over background detail. If you instead chose a narrow aperture, a slow shutter, and the same low ISO, brightness could again be correct, but depth of field would be greater and the background would appear sharper [2].
The second hypothetical version would show more background detail, which might be desirable for a landscape but distracting for a portrait [2]. The slow shutter would also risk blurring the person if they moved slightly, even though they intend to stand still [1]. Same brightness, different depth of field and different motion risk. That contrast is the core lesson: exposure settings are not interchangeable even when the meter reads the same.
A third hypothetical version could keep the wide aperture but raise ISO and use an even faster shutter. Brightness might still be correct, but higher ISO brings the qualitative tendency toward reduced colour saturation and increased grainy noise [1]. The example shows why ISO is usually considered after aperture and shutter when light allows, rather than as the first choice. All three versions are hypothetical illustrations of the linked logic, not measurements of any camera.
The following worked example is explicitly hypothetical and original, constructed solely to illustrate coupled trade-offs from the cited mechanisms. No camera was tested and no measured values are claimed. Assume a bright scene, a stationary human subject, and a desire for correct exposure with background softening. Option A specifies a wide aperture, fast shutter, and low ISO. Option B specifies a narrow aperture, slow shutter, and low ISO. Option C specifies a wide aperture, very fast shutter, and elevated ISO.
Option A delivers high photometric throughput via large aperture diameter, brief integration via fast shutter, and low sensitivity via low ISO, yielding correct exposure with shallow depth of field and frozen motion [1][2]. Option B delivers low throughput via small aperture, long integration via slow shutter, and low sensitivity, yielding correct exposure with greater depth of field and increased risk of subject motion blur [1][2]. The two options are exposure-equivalent by construction but pictorially distinct.
Option C maintains throughput and further reduces integration time, compensating with increased sensitivity. Exposure remains correct, depth of field remains shallow, and motion remains frozen, but the qualitative rendering shifts toward the reduced saturation and grainy noise associated with higher ISO [1]. The example demonstrates that ISO compensation preserves exposure while altering rendering, whereas aperture compensation alters depth of field and shutter compensation alters motion rendering.
The hypothetical comparison clarifies the decision hierarchy. Aperture should be fixed by depth-of-field intent, shutter by motion intent, and ISO by remaining light constraints, with the qualitative ISO trade-off accepted only when necessary [1][2]. Because the example is hypothetical, its value is logical rather than empirical: it shows how the cited mechanisms combine, not how any specific camera performs.
Comparing Choices: What Each Setting Gives and Takes Away
Choosing among aperture, shutter speed, and ISO is a comparison of what each control gives and what it takes away. Aperture gives you control over depth of field and light throughput, but a wide aperture reduces depth of field while a narrow aperture requires more time or sensitivity to maintain brightness [2]. Shutter speed gives you control over motion rendering, but a fast shutter requires more throughput or sensitivity while a slow shutter risks blurring moving subjects [1].
ISO gives you flexibility when light is scarce, because higher ISO means less light is needed for proper exposure [1]. The cost is qualitative: higher sensitivity tends to reduce colour saturation and increase grainy noise [1]. Lower ISO avoids that tendency but demands more light, which may force a wider aperture or slower shutter. No control is universally best; each choice privileges one pictorial quality over another.
A simple comparison helps in the field. If background blur matters most, start with aperture. If freezing or showing motion matters most, start with shutter speed. If neither aperture nor shutter can solve a darkness problem, consider ISO and accept its trade-offs [1][2]. The comparison should be made with framing, distance, and output criteria aligned, so you are judging the control itself rather than a changed viewpoint [2].
Failure cases often come from optimising for brightness alone. A photograph can be correctly exposed yet fail because the background is too sharp, the subject is blurred by motion, or the rendering is grainy at high ISO [1][2]. Recognising those failures as trade-off outcomes, rather than as mysterious camera faults, lets you adjust the right control next time. The checklist at the end of this article turns that recognition into a repeatable routine.
The three controls form a multi-objective optimisation problem in which brightness is a shared constraint and depth of field, motion rendering, and sensitivity-related rendering are distinct objectives [1][2]. Aperture uniquely controls depth of field, shutter uniquely controls motion rendering, and ISO uniquely controls sensitivity-related rendering, while all three jointly control exposure [1][2]. Optimisation therefore requires prioritisation among objectives, not merely satisfaction of the exposure constraint.
Aperture trade-off: increasing diameter increases throughput and reduces depth of field; decreasing diameter reduces throughput and increases depth of field [2]. Shutter trade-off: decreasing integration time freezes motion but reduces delivered light; increasing integration time shows motion but increases delivered light [1]. ISO trade-off: increasing sensitivity reduces light requirement but tends to reduce saturation and increase grainy noise; decreasing sensitivity increases light requirement [1]. Each trade-off is directional and qualitative in the sources, without quantified magnitudes.
Comparative evaluation must control confounders. Framing, subject distance, and output criteria should be held constant when attributing differences to a single control [2]. Without such control, depth-of-field or motion differences may reflect viewpoint or reproduction changes rather than the intended parameter. The sources support qualitative comparison under aligned conditions, not precise numerical prediction.
Failure modes are predictable from the trade-off structure. Correct exposure with excessive background sharpness indicates aperture was not prioritised; correct exposure with subject blur indicates shutter was not prioritised; correct exposure with grainy rendering indicates ISO was raised without necessity [1][2]. Diagnosis should therefore identify which objective was sacrificed, rather than treating exposure correctness as sufficient for pictorial success.
Manual Mode on One Specified Camera and a Safe Practice Checklist
Manual exposure means you adjust both shutter speed and aperture yourself [3]. The instructions in this section apply only to the Sony ILCE-7M2 manual mode described in the source, and they should not be generalised to all cameras [3]. On that camera, you set the mode dial to M, select aperture with the front dial, and select shutter speed with the rear dial [3]. Menu names and dial assignments are device-specific.
On the same specified camera, when ISO is set to other than ISO AUTO, you use the Metered Manual indicator to check exposure, with movement toward plus making images brighter and toward minus making them darker [3]. When ISO is set to ISO AUTO, ISO changes automatically to achieve appropriate exposure using your aperture and shutter settings, and the ISO indicator blinks if those settings are not suitable [3]. The Metered Manual indicator does not appear in that ISO AUTO case [3].
That camera also has a manual shift behaviour: by setting the AF/MF/AEL switch lever to AEL and rotating the front or rear dial while pressing the AEL button, you can change the shutter and aperture combination without changing the set exposure value [3]. The source also notes that the Metered Manual indicator flashes when ambient light exceeds its metering range, that the SteadyShot warning indicator does not appear in manual exposure mode, and that monitor brightness may differ from the actual image [3]. These are specific to the ILCE-7M2 and should not be assumed elsewhere.
Use this safe observation checklist with any camera, without needing special equipment. First, decide whether depth of field or motion matters more, and choose aperture or shutter speed accordingly [1][2]. Second, adjust the remaining controls to restore brightness, considering ISO last because of its qualitative trade-offs [1]. Third, take a test frame and inspect it with magnification to check depth of field and motion rendering [2]. Fourth, note which control you changed and what effect you observed, so your next decision is based on evidence rather than guessing.
Manual exposure on the Sony ILCE-7M2, as documented in the source, involves direct adjustment of both shutter speed and aperture [3]. The specified procedure is to set the mode dial to M, select aperture via the front dial, and select shutter speed via the rear dial [3]. These control assignments are specific to that model and mode; they must not be generalised to other cameras, whose dial layouts and menu structures differ.
Exposure verification on that camera uses the Metered Manual indicator when ISO is set to other than ISO AUTO, with plus indicating brighter images, minus indicating darker images, and zero indicating appropriate exposure as analysed by the product [3]. When ISO is set to ISO AUTO, ISO adjusts automatically to achieve appropriate exposure from the selected aperture and shutter speed, with a blinking ISO indicator signalling unsuitable combinations [3]. The Metered Manual indicator is absent under ISO AUTO [3].
Manual shift on the specified camera permits changing the shutter-aperture combination without altering the set exposure value, via the AEL lever position and dial rotation while pressing the AEL button [3]. Additional device-specific behaviours include flashing of the Metered Manual indicator beyond its metering range, absence of the SteadyShot warning indicator in manual mode, and possible discrepancy between monitor brightness and actual image brightness [3]. None of these behaviours should be extrapolated beyond the ILCE-7M2 manual mode.
A generalisable practice checklist, independent of device-specific controls, is as follows. Prioritise depth of field or motion, fix aperture or shutter speed accordingly, then compensate with the remaining parameters, treating ISO as the final lever due to its qualitative costs [1][2]. Capture a test frame, inspect it with magnification for depth of field, and record the settings and observed effects [2]. This procedure respects the coupled exposure system while avoiding unsupported claims about any particular camera's performance.
Sources & further reading
Explore the references behind this guide. External pages may change after our review.
- A Basic Look at the Basics of ExposureNikon · Accessed 6 Nov 2026
- Understanding Maximum ApertureNikon · Accessed 6 Nov 2026
- Help Guide | Manual ExposureSony · Accessed 6 Nov 2026
Article updated 6 Nov 2026.
Found something we should revisit?
Good explanations get better with thoughtful feedback.